جدول المحتويات
Cell properties
The cells in the design of reports in the innovative solutions program are divided into three types
Text cell - digital cell - equation cell
Title: Type the name of the cell
Format text: To add custom formatting to the cell with custom labels for more clarity, we use the following example: If we add an account name and want to put it after it, Respected people, we write “Gentlemen: / # Respected.” In the formatting text, it will appear to us in the report Gentlemen: / “The account name from the database” Respected.
Width: the width of the cell
Programmatic Name: To assign a programming name to the cell in case we want to design the report in Lua]
General Tab
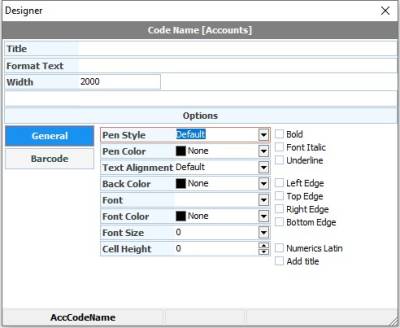
Cell boundaries: Determines the type of boundary for the cell
Stroke color: Assign the border color to this cell
Writing direction: to specify the direction of writing to the right, left, or center
Background color: To assign a color to the cell background
Font: to define the font type
Font color: Assigns the font color to a cell
Font size: Define the font size for the cell
Cell height: Determines the height of the cell
Bold: Make the font bold
Italic: To make the font italic
Underscore: to add a line under the texts
Left border: Adds the left border of the cell
Upper bound: Adds the upper bound to the cell
Right border: Adds the right border of the cell
Bottom border: Adds the bottom border of the cell
Latin numbers: to force the numbers to appear in Latin, regardless of the regional options of the operating system.
Add title: to add the cell name before the code value.
Barcode tab

Barcode type: to choose the type of barcode
Bar width: Determines the barcode density
Show text: to show the text of the barcode
Centering: to make the barcode in the middle
Lengthening the columns from the top: To lengthen the columns of the barcode lines upwards
Adding columns from the bottom: To lengthen the columns of barcode lines down
Add verification characters: to add the start and end lines of the barcode for verification
Tab No.
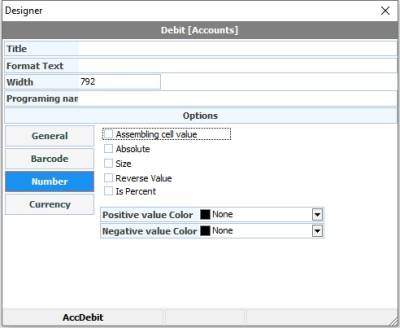
Group cell value: to group the cell value and add it to the totals below the detail
Absolute: To always show the number cell value in absolute value.
Size:
Invert value: to invert the value of the number cell, if it is positive, it will become negative or vice versa.
Positive value color: to assign a specific color in case the result in the cell is positive.
Negative value color: Assigns a specific color in case the result is negative. For example, we want to distinguish debit balances from credit balances in the report by coloring the value.
Currency Tab
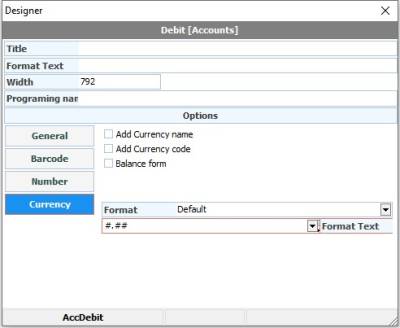
Add currency name: to add the name of the currency used in the cell
Add currency symbol: to add the currency symbol used in the cell
Balance package: add the phrase debit or credit balance next to the currency.
Format: to choose a sample value display format. Currency, amount or money format found in admin options or other formats such as drop the number for example and write it as text instead of numbers.
Format Text: Specifies the cell's formatting type
History tab
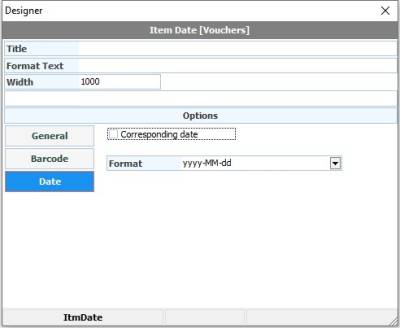
Corresponding date: to show the corresponding date in Hijri or Gregorian according to the default date in the program.
Format: to choose the date or time format
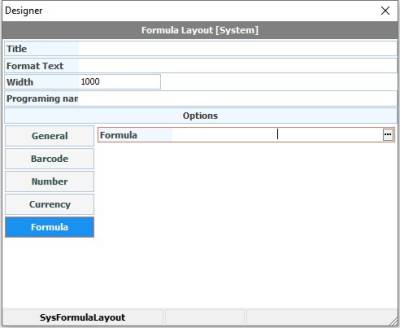
To add custom equation